The basics of Docker Compose
May 2024 (605 Words, 4 Minutes)
Docker Compose in a nutshell
When you start using Docker extensively, there will come a time when you have a huge number of containers that you need to care for and manage. Docker Compose is a super cool tool that will help you with this otherwise cumbersome task. You can easily manage multiple containers from a single file.
Docker Compose relies on a YAML file to make its magic. All the instructions to fire up your containers, what images to use, how to set its configuration, the volumes, networking settings, and also secrets are defined in a single YAML file. This file is usually called compose.yaml. You’ll see this file with the name of docker-compose.yaml too, but the preferred one, according to Docker official documents, is compose.yaml.
YAML, which stands for YAML Ain’t Markup Language (originally, it was said to mean Yet Another Markup Language), is widely used today. It’s easy to learn, and I recommed you take a look at Learn YAML in Y minutes
The Compose application model
I read this in Docker’s official documentation on Compose, and I loved how it’s explained. These are the parts of a Docker Compose file.
Computing components of an application are defined as services. Services communicate with each other through networks. Services store and share persistent data into volumes. Some services require configuration data that is dependent on the runtime or platform. This is defined as configs. A secret is for sensittive data that shouldn’t be exposed.
In your Docker Compose file, you’ll define the services, the networks, the volumes, the configs, and the secrets of your apllication stack.
To interact with your Compose application, you use the Comppose CLI.
Installing Docker Compose
In the Docker Docs on how to install Docker Compose, they suggest 2 ways: using the apt repository (you need to add the repository to Apt) or doing it manually. I installed it manually, and the result was interesting. Let me show you.
To install it manually, these are the 4 commands you need to run.
DOCKER_CONFIG=${DOCKER_CONFIG:-$HOME/.docker}
mkdir -p $DOCKER_CONFIG/cli-plugins
curl -SL https://github.com/docker/compose/releases/download/v2.27.0/docker-compose-linux-x86_64 -o $DOCKER_CONFIG/cli-plugins/docker-compose
chmod +x $DOCKER_CONFIG/cli-plugins/docker-compose
The latest version of Docker Compose is v2.27.0, and it’s the one specified in the command above. The result, however, was this one.

It installed version v2.20.3! Why?
Composing with Docker Compose
To see Docker Compose in action, I built a very simple Docker Compose file. There are 3 services, that represent 3 different versions of that app from the previous article. That one had 2 versions. I created a third one for this experiment.
This is the Docker Compose file. The first line, name, is a property that you can use to give your project a name. Below it, I’m defining the services. I omitted the other elements, for simplicity.
name: theapp

services:
  app1:
    image: rmiravalles/theapp:v1
    ports:
      - "8061:80"
  app2:
    image: rmiravalles/theapp:v2
    ports:
      - "8062:80"
  app3:
    image: rmiravalles/theapp:v3
    ports:
      - "8063:80"
The command to run this file is docker compose up. The Docker Engine will build everything that’s in the compose.yaml. In this case, the image is ready, and I just told Docker to go and fetch it from my Docker Hub. You can build an image from scratch, though, from an existing Dockerfile. For that, instead of the image parameter, you use build.
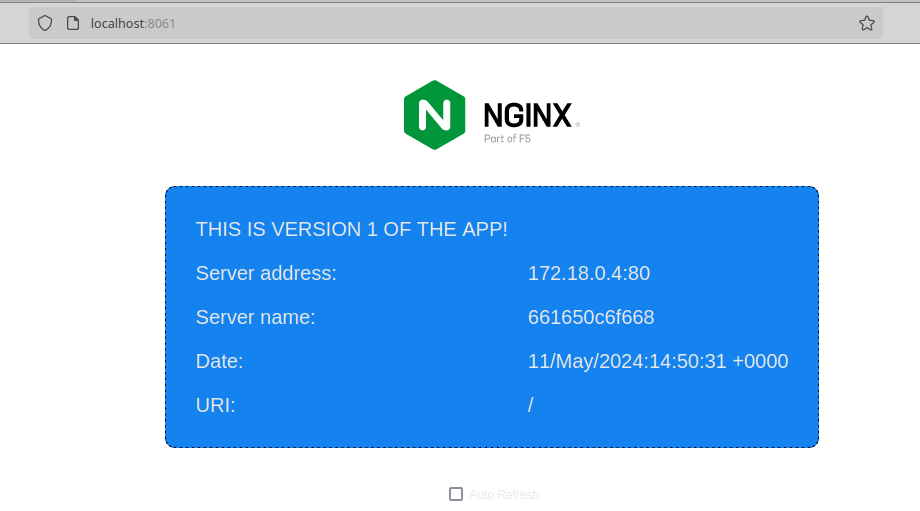
This will fire the containers based on the images indicated, and it will expose those ports indicated in the ports parameter. In this case, port 8061 for app1, 8062 for app2, and 8063 for app3.
When you run the docker compose up command, the output looks like this.

And here are the 3 apps running in their respective ports.


I spun up 3 applications using a single YAML file, and that’s powerful!
There’s a lot more to Docker Compose, and I may dedicate an additional article or 2 to it, as I move along with my studies.
Thank you for staying with me until here!
Have a great weekend!